
Manca poco a San Valentino. Lo festeggiate? Io solitamente no. Però per caso, qualche giorno fa m'è uscito questo progettino, tanto cuoricioso che è perfetto per la festa degli innamorati.
There are just a few days left to Valentine's day. Do you celebrate it? I usually don't. Anyways, a few days ago I unpredictably came up with this little project, so heart-y it's perfect for the day of romantic love.

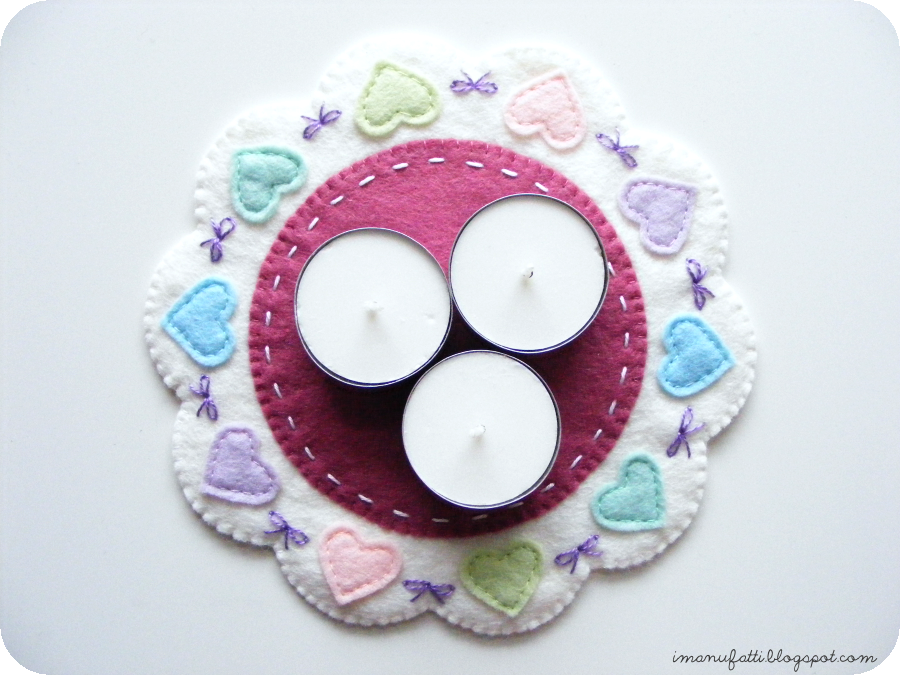
L'idea anche stavolta nasce dalla necessità: avevo bisogno di un qualcosa da mettere sotto alle candeline, sul tavolino in salotto (sono una di quelle a cui piacciono le candeline, sì). I centrini di casa erano già tutti presi, così mi sono inventata questa candle mat (come si potrebbe tradurre in italiano? sotto-candela? tappetino per candele? boh), ovviamente in feltro, ovviamente pastello, ovviamente con qualche dettaglio ricamato come piace a me.
Actually, I came up with the idea of a candle mat simply because I needed one for the candles in my living room (I like candles). And, of course, it had to be made of felt, in pastel colours and with tiny embroidered details, just the way I like it.
Se avete voglia di creare il vostro candle mat cuoricioso, dovrete munirvi di:
♥ feltro, nei colori che più vi aggradano; io ho usato il bianco naturale, il rosso violaceo, e poi i colori pastello per i cuori: azzurro, rosa, lillà, verde, menta
♥ filo semplice da cucito negli stessi colori del feltro
♥ filo da ricamo bianco e violetto
♥ ago, spilli, forbici appuntite e affilate
♥ carta e stampante per stampare le sagome in fondo a questo post.
To make a candle mat like this, you'll need:
♥ felt, in different colours; I used natural white, rose pink and pastel colours for the hearts: pink, baby blue, green, mint and lilac
♥ simple sewing thread, same colours as felt
♥ embroidery thread in white and violet
♥ needle, pins, sharp scissors
♥ paper and printer to print out the templates at the bottom of this post.
PROCEDIMENTO / INSTRUCTIONS
Stampa e ritaglia le sagome in fondo al post. Fissa la sagoma 1 sul feltro bianco con alcuni spilli e ritaglia. Ripeti con la sagoma 2 e il feltro rosso violaceo. Usa la sagoma a cuore per ritagliare un totale di 10 cuori (2 per ogni colore). Fissa il cerchio di feltro al centro della base bianca e cuci con punto a sopraggitto e filo dello stesso colore. CONSIGLIO: prima di fissare il cerchio al centro e quindi cucirlo, fai una prova con tutti cuoricini in posizione.
Print and cut out the templates. Pin template 1 on white felt and cut out 1x white piece. Repeat with template 2 and rose pink felt. Use the heart template to cut out 10 pastel hearts (2 of each colour). Pin the rose pink piece onto the white piece at its centre and sew in matching thread using whipstitch. TIP: put all the hearts in place before sewing the rose pink piece, just to make sure you've pinned it perfectly centred.

Usa del filo da ricamo bianco per ricamare una linea lungo in bordo del cerchio, con punto filza.
Use white embroidery thread to sew a straight line along the edge of the rose pink piece, using straight stitch.

Fissa i cuoricini in posizione con uno spillo e cucili con filo dello stesso colore del feltro, a punto indietro.
Pin all the hearts in place and sew them in matching thread, using backstitch.

Usa del filo da ricamo violetto per ricamare dei fiocchetti ai lati di ogni cuore, con punto margherita.
Take a piece of violet embroidery thread and sew a little bow beside each heart, using detached chain stitch (or single lazy daisy stitches).

Fissa il tutto su del feltro bianco e ritaglia lungo i bordi per ricavare il retro del candle mat. Cuci assieme le due parti con filo bianco e punto festone. Fissa il filo con un nodo sul retro.
Pin the candle mat on a piece of white felt and cut along the edges to get the back piece of the mat.

Ed ecco fatto, il tappetino-sotto-candele cuoricioso è finito.
That's it, your new heart-y candle mat is ready.

♥ Buon San Valentino! ♥
♥ Happy Valentine's day! ♥
{apri l'immagine in una nuova scheda/finestra e stampa le sagome mantenendo le dimensioni del file originali!}
{open the image in a new tab/window and print the templates keeping the original file size!}

Per favore, rispetta il mio lavoro e la mia creatività: se vuoi realizzare e pubblicare sul tuo blog un oggetto partendo da questo tutorial, sei gentilmente pregato/a di citarne la fonte con un link a questo post. La vendita di questo tutorial, di oggetti realizzati seguendo questo tutorial e la riproduzione per intero di questo tutorial su un altro sito sono espressamente vietate. Grazie!
{open the image in a new tab/window and print the templates keeping the original file size!}
Per favore, rispetta il mio lavoro e la mia creatività: se vuoi realizzare e pubblicare sul tuo blog un oggetto partendo da questo tutorial, sei gentilmente pregato/a di citarne la fonte con un link a questo post. La vendita di questo tutorial, di oggetti realizzati seguendo questo tutorial e la riproduzione per intero di questo tutorial su un altro sito sono espressamente vietate. Grazie!
Please, respect my work and my creativity: if you want to make an item from my tutorial or to blog about this project, remember to credit me and link back to this post. Do not reproduce my entire tutorial on your site. This tutorial is for non commercial use only. Thank you!